In this post, I will walk through how combining 2 designs in Embird Embroidery Software makes stitch out faster and less wasteful. I will step through how to re-arrange the steps of each design to stitch out in one hoop. This post applies to In The Hoop (ITH) projects such as felties, ornaments, bag tags, and key fobs.
Disclaimer: Some of the links in this post are affiliate links. If you click through a link and make a purchase, it will earn me a small commission at no additional cost to you! For more info, see my disclosure.
Copy and Paste
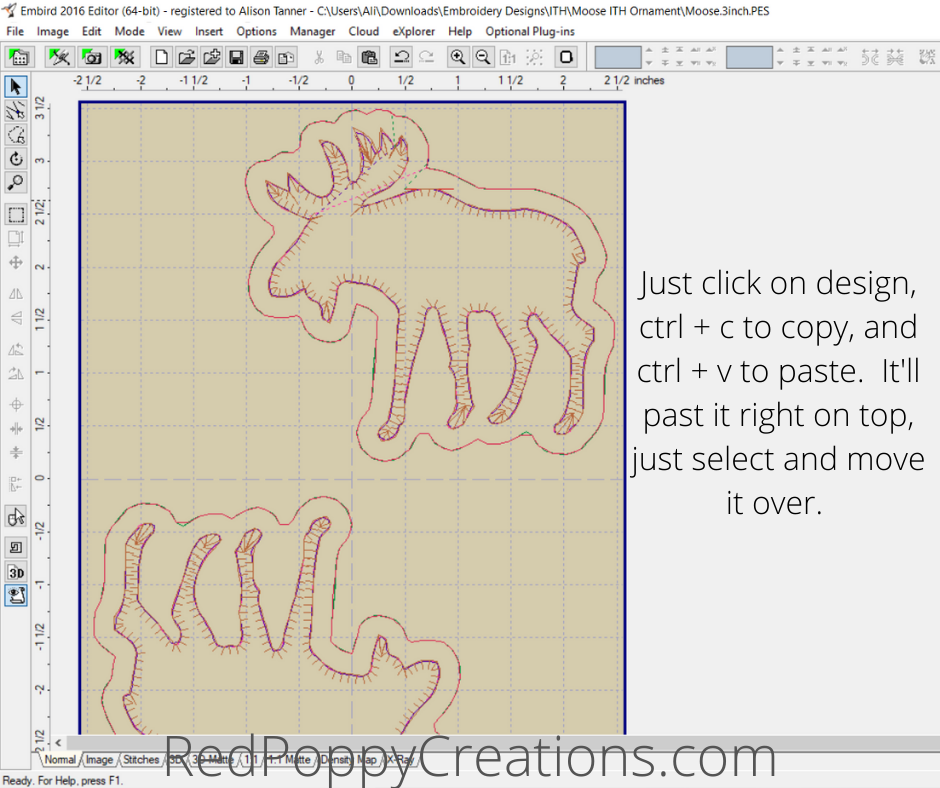
The first step is to have the design you want to use opened in Embird. I am using the In The Hoop – Moose Ornament design from Alphalicious Designs. Since I just want to have 2 of the same design, I just click on the design and copy (ctrl + c). Then I paste (ctrl + v) and it’ll stick it right on top of the first one. Just click and drag it around.
Join Designs
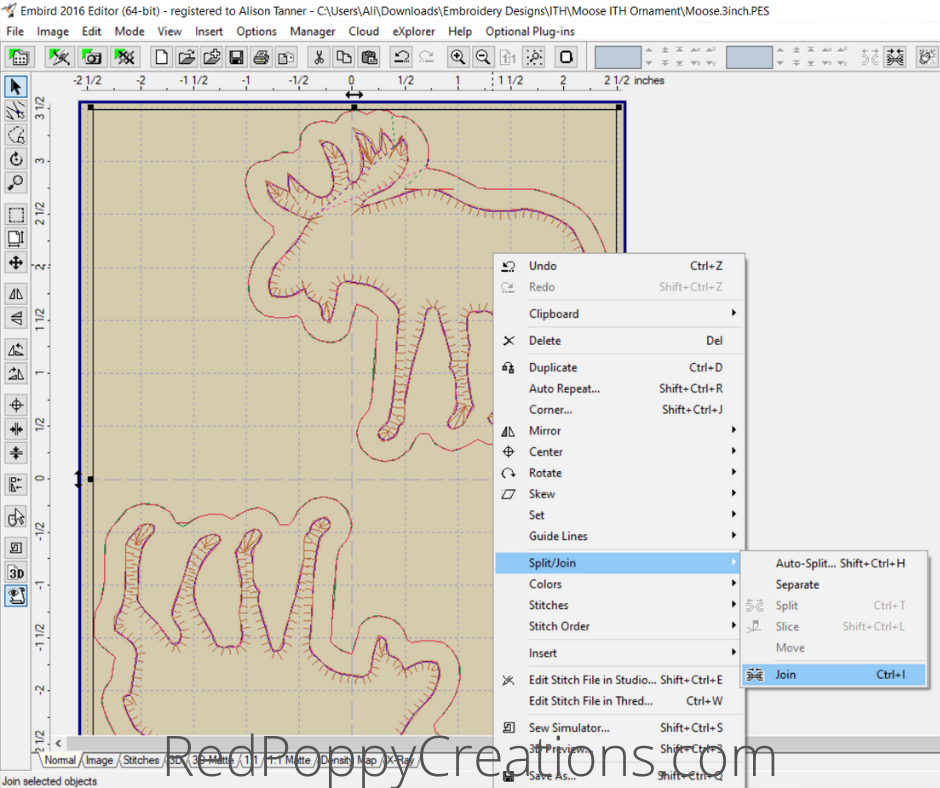
Once you get them spaced how you like them, go ahead and join the 2 designs. First, click on one, then hold ctrl and click on the other. Next you can right click on your selection and choose <join> or use the shortcut ctrl + i.
Separate All Colors
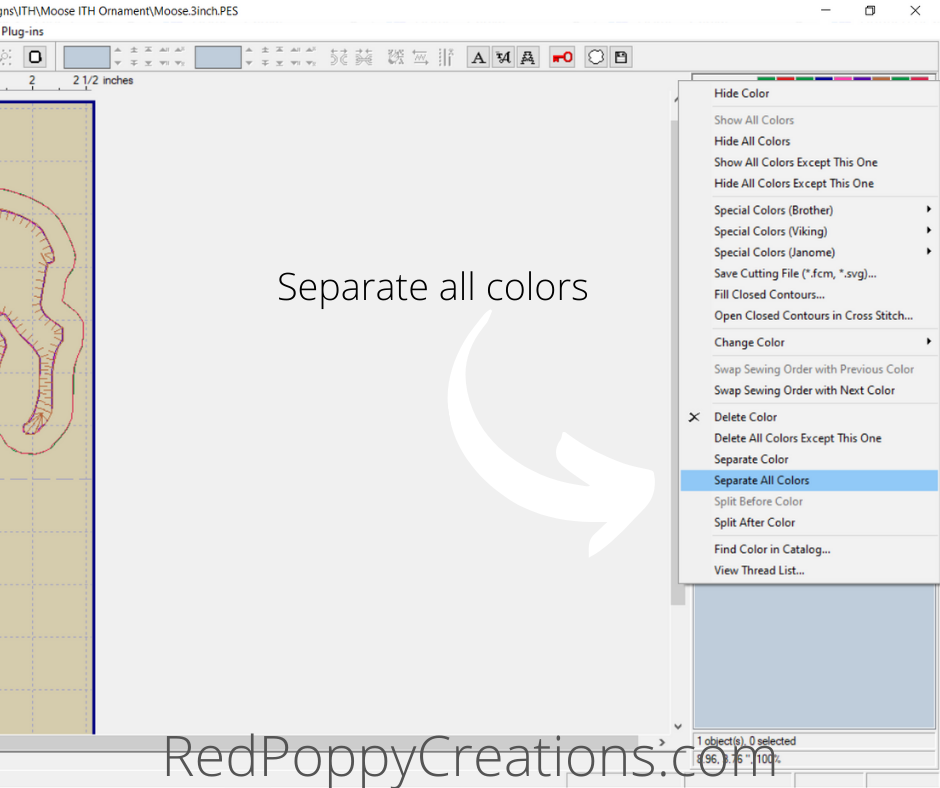
When you click <join>, now 2 designs are combined, but will not stitch in the order you like. It’ll just stitch in completion the first one before starting on the second one. Now I hover over any of the color blocks in the top right corner and right click. Choose <separate all colors>. This will break them up into individual steps.
Changing Item Order
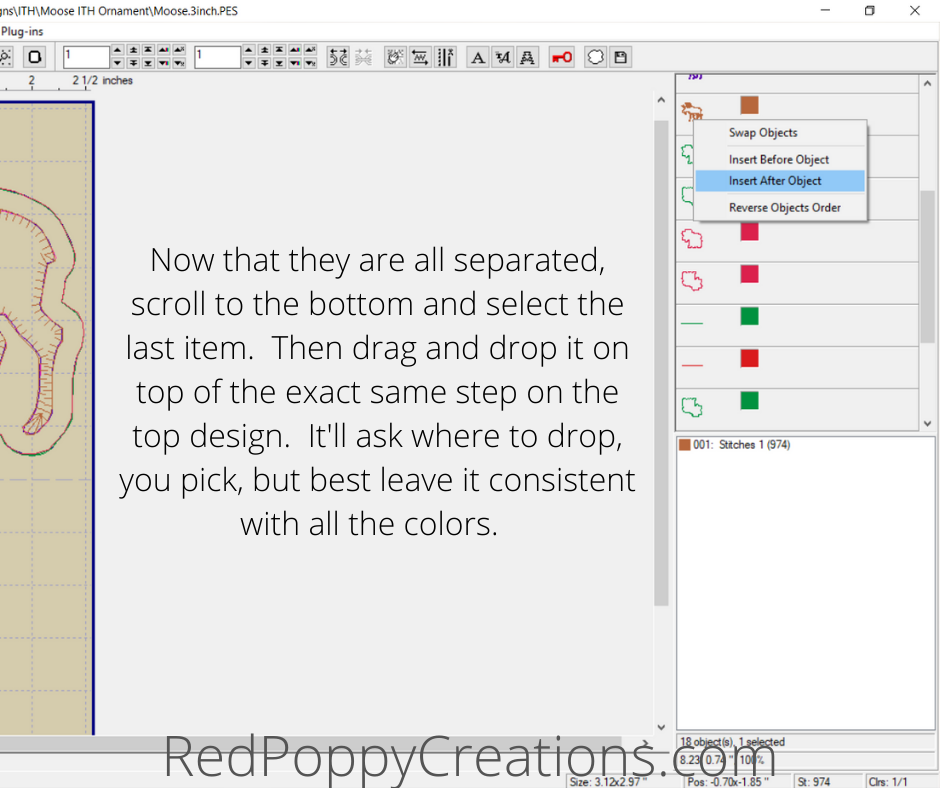
Now you will notice on the right hand side that all your color steps are broken down individually. If you left click on a design (not the color), a box will surround it. Now left click again and drag it around. I like to start at the last step, grab the item, drag it until you get mid-way (last step of the first design) and then drop. It’ll ask you if you want it to go before or after the one you dropped it on. I doesn’t matter which you choose, but try to be consistent! Then I go through all the “second” design items and drop them with the “first” design items. Once you are done moving all the items around, highlight everything in the hoop and <join> (ctrl + i).
Now, you may see other ways to do this, but none have worked out. Either they add jump stitches to odd places or they change the sewing order so that it won’t stitch out correctly. I think on the menu it’s called <color sort> and <smart color sort>. Like I’ve said, I have had ZERO luck with those working properly!
Personalizing
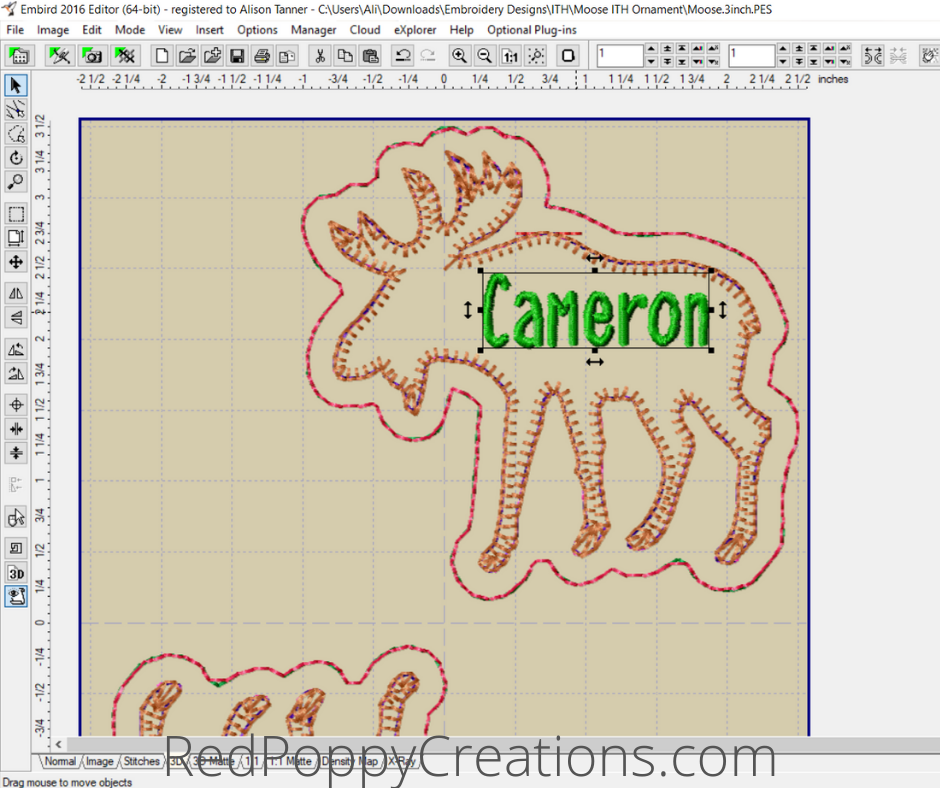
Next I go and merge the name or date to the ornaments. Sometimes I don’t add anything, but most customers do want at least the year added. After I personalize, join it to the main design.
Change Stitch Order
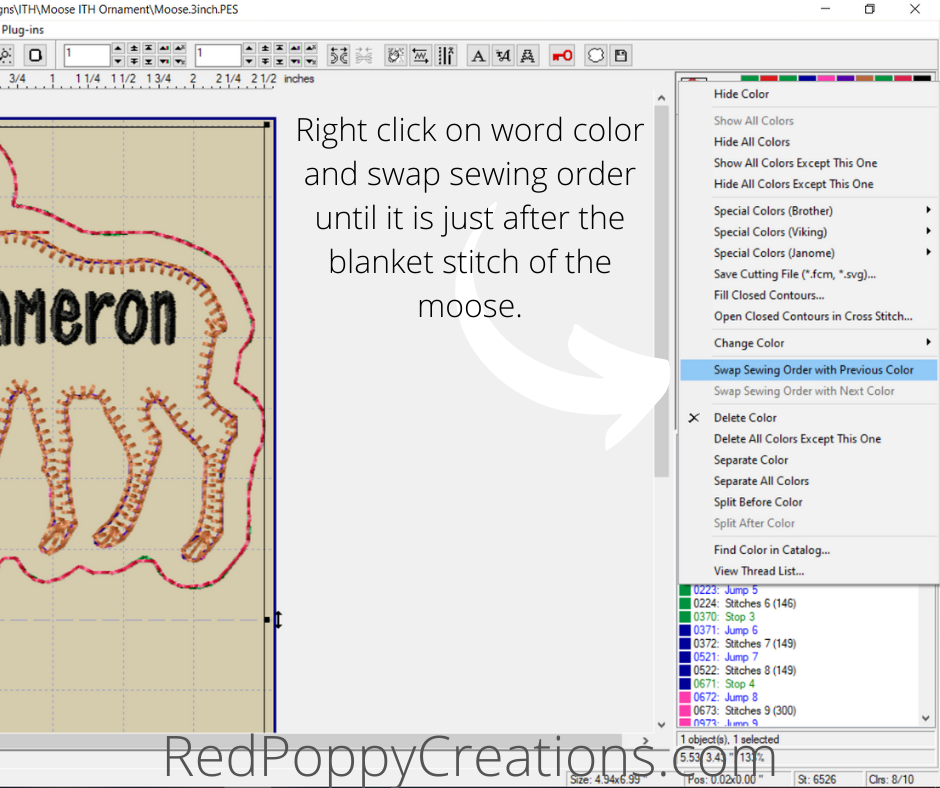
Now, you joined the name/date to the ornament, but it’s at the end. You want to move it ahead of the final 2 stitches so that the backside of the embroidery is covered by fabric. To do this, you right click on the last color and select <swap sewing order with previous color>. Then repeat this one more time (this design stitches back tack down 2 times. After you move it up, then you can change the color to your liking.
All Done!
Now all you need to do is save it and stitch it out! I hope this tutorial for combining 2 designs in Embird was helpful. If your curious about my ornaments and how to do In The Hoop designs, see my post HERE. If you have any questions about Embird Editor, feel free to comment below and I will do my best to help!
